Temperature Sensor Network, Part 2: Nodes
This is the second part of my temperature sensor network series, as explained in Part1. This part also describes the used hardware.
Requirements and features
The basis of the whole temperature sensor network is of course the temperature sensor node. To design a temperature sensor node we need to first determine some requirements for the nodes.
That is why I have made a list of requirements for the sensor nodes accourding to a MoSCoW principle.
This resulted in the following requirements:
- The node must read the temperature periodically
- The node must send the temperature to a server
- The node should be compact
- The node should report errors
- The node could have changeable settings
- The node could use a minimal amount of power
- The node could run on a battery
- The node will not be updated over the air
Based on these requirements I defined a minimum set of features for a first prototype:
- Reading the temperature sensor
- Sending a message over 802.15.4
- Some timing loop to make periodic measurements
- A shell for debugging.
For the networking message I first wanted to use MQTT-SN, but after some difficulties implementing this, I decided to use CoAP instead. Luckily for me RIOT-os contains a lot of modules that can do most of these things. Most of this can be based on riot modules: bmx280, gnrc, xtimer, gcoap, shell and their requirements
For getting started with RIOT-os there is a good course online, the RIOT-course. I followed this one and you will see some similatities in the final code of this project.
Hardware
Before I can get started with writing the software. I need to connect the hardware and verify that the sensor works.
As mentioned in Part1, we will use a BMP280 sensor and a E104-BT5040U board.
The BMP280 sensor can be connected via SPI.
To connect the sensor the following schematic is used:

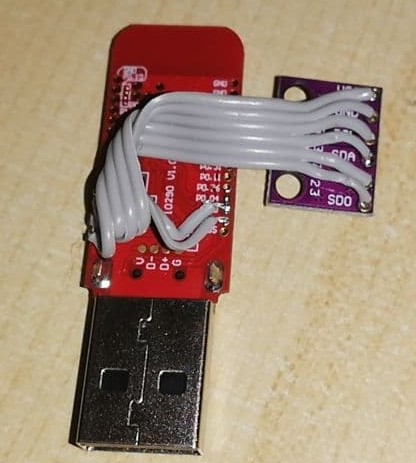
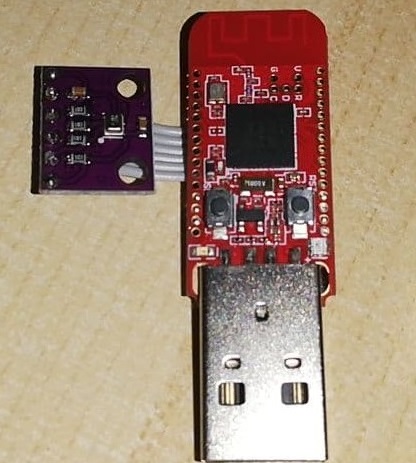
The difficulty in making this schematic is the fact that the E104-BT5040U board has 1.27mm pitch holes, which makes it difficult to connect headers. To connect this I soldered a bit of 6 strand flatcable to the sensor and the board. This is more difficult to replace, but reliable and compact. A few tips when soldering this:
- You can strip all strands of a flatcable at the same time using a knife and a bit of pressure.
- Pre-tin both the wires and the pads of the sensor and the dongle.
- Solder the wires straight to the pads of the board, do not try to get them trough the holes.
With the sensored soldered to the board, the node looked like this:
COAP
As mentioned before I use CoAP as messaging protocol for the sensor nodes. This means that the sensor nodes will send a message based to a [HOST]/path.
For the temperature I use: [HOST]/temp. For other sensors we can then later use different paths.
As all the nodes will post to the same URI, it falls to the host to distinguish between sensor nodes.
CoAP can also be used to request information form a server and to expose certain settings on the sensor node. This is something that could be implemented later.
More information on the networking setup can be found in Part3.
Timing
There are 2 ways to read out the sensor on the node. The first one is to read the sensor directly from the shell. This requires an USB connection to the device and is used for debug purposes. The second option is the automatic CoAP message, that will be send every minute. This can be enabled/disabled via the shell, and is enabled by default.
Source code
The source code for this project can be found on github as RiotTempsensor This also contains the configuration files and a little explaination on installing/compiling.